


A Guide To Selecting Your Wooden Wick
Confused about how to make candles using wooden wicks? You’re not alone.
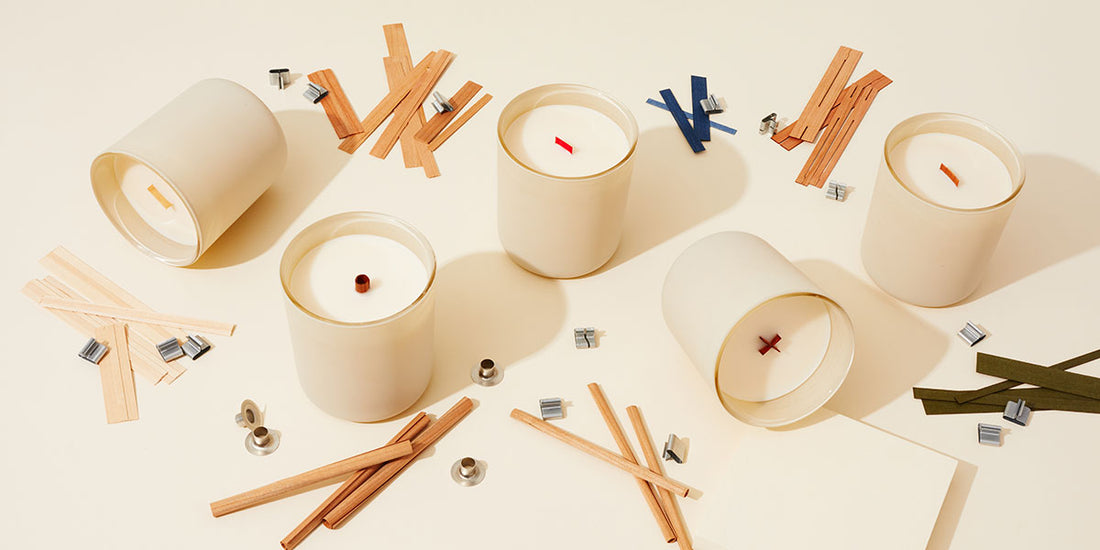
The wonderful world of wooden wicks is a little different than working with its common cotton wick cousin. Instead of just having one general size to pay attention to, you have 2 different measurements, a width and a thickness! Wowee!
At first glance, this can appear daunting and confusing but we assure you - it’s absolutely not!
A little science mixed with a little creativity and patience and you’ll have your perfect wooden wick candle in no time. Here’s everything you need to know so that you can be a pro when working with varying wooden wick widths and thicknesses.
understanding wooden wick thicknesses

On the wooden wick product pages and packages you will see a .01, .02, .03, or .04 increasing in .01 increments. This allows for a steady and even jump in material when burn testing. You also find that the widths go up by .25 inches starting at .375, .5, .625 and so on.
The .01, .02, .03, and .04 measurements are referring to the wooden wick’s thickness. Think of the thickness as the bulk of your wood material. Your thickness will influence the overall burn (or no burn) of your wood wick candle.
The thickness you choose will be heavily influenced by the wax type you plan to use. For more information about which wax to use with which starting thickness, visit our wax to wick match up and wick selection guide.
Due to their oily or dense nature, some waxes require much more wood material in order to burn. For example, a 100% soy wax will almost always need a .04 thickness in order to burn optimally. This is because the wax is very oily in nature and requires more wood material to create combustion!
For example, from the wax to wick matchup we know that a .02 wick is the best starting wick to use with coco apricot creme wax.
when to change your wick width

After learning which wick thickness typically pairs best with your wax type, you will want to obtain a wick sample kit and begin burn testing. For more information about burn testing, visit our blog burn testing with a wick sample kit.
Before burn testing, you will want to take measurements and decide which candle vessel you plan to use. Your vessel diameter will influence which width you choose. You can plug all of this information into our Wick Selection Guide and it will give you an approximate starting place to begin your burn testing.
hot tips
- The wick’s width will influence the melt pool diameter
- The wick’s thickness will influence the overall burn of the candle and flame size
what to look for and adjust when burn testing
Once you have your starting size, you will conduct a burn test at 4 hour intervals looking for the following:
- A full melt pool in 2-3 hours
- A melt pool of approx ½” depth
- The flame hangs around ½” height
If your candle achieves a full melt pool more quickly than 2-3 hours, has a large dancing flame, is smoking or causing the wax to turn black, your candle is burning too hot and you will first want to change to the next wick smaller in thickness. For example if you were using a .02, you will want to go to a .01 thickness.
scenario: i'm at the smallest thickness & it's still too hot
If your candle is the smallest in thickness available for its variety (.01 or .02) you will want to test the next size down in width in order to decrease the overall amount of wood material being burned. For example, if you were using a .01 x .625 try the .01 x .5.
scenario: i have a drowning or dead flame
If your candle looks like it’s drowning, has a small or inconsistent flame, if it’s going out or doesn’t light then you will want to move to the next wick size larger in thickness. For example if you’re at a .02 move up to .03 in the same width you started with and test from there.
scenario: i don't have a full melt pool but my flame looks good
If your candle has been burning with a consistent ½” flame with no smoke or soot for over 2 hours and hasn’t achieved a full melt pool or is tunneling, you will want to keep the thickness you have and move up to the next size in width. For example, if you were using a .02 x .5 wick you will move up to a .02 x .625 wick.

You got this, maker!
Keep testing until you find the combination that gives you results closest to the 3 markers above.
When testing, remember it’s important to make sure your wicks are trimmed to approx 3/16” or .02” above the wax, and adding dyes, micas, or altering fragrance concentrations will change how a wick burns so make sure to test your candles as you plan to sell them!
If you’re struggling with finding the perfect wick, don’t give up! It’s just a couple of tweaks and burn tests away.
If you need more help, email us at hello@makesy.com and our team will help you find your candle’s wooden wick bff.
We also have a wide variety of resources on our tutorial video series and FAQ for more makers tips and tricks when working with wooden wicks.
And if you want to get real time feedback and inspo from like minded makers, be sure to get connected with our createful community facebook group.
Now go make it happen!

