


How To Make Cold Process Soap
The instructions below will teach you how to make cold process soap using our innovative process. Our process is different for three main reasons:
- Using our formula, your soap is safe to use in 2 days! You will know exactly what the final product weight will be. You can make and sell your soaps faster, knowing what the correct label weight should be, without waiting for the water to evaporate.
- We use a 50/50 lye solution. This lye is already dissolved in water. It is safer to use, eliminates toxic fumes and quicker to produce soap using it. Because of using the 50/50 solution, we produce everything at room temperature. No thermometers needed.
- We have crafted the perfect soap base - The Trinity Bend - that allows you to use a premixed blend of oils that will save you time while you make soap. And there is still plenty of customization left for you to be creative!
cold process soap ingredients
Here are the ingredients and tools you need to make 4.5 lbs of soap using our 5 lb wooden box mold:
- One 5 lb wooden box mold
- 3 lbs (48 ounces) trinity blend oil
- 14 ounces 50/50 lye solution
- 7 ounces distilled water (you can also use aloe vera concentrate, goat milk, or floral water in place of distilled water)
- Optional: 2 ounces fragrance oil or essential oil (check out our recommended fragrances for CP soap here)
- Optional: 1 ounce kaolin clay (to help retain fragrance composition)
- Optional: 0.1 ounce (a large pinch) himalayan pink salt (to help make your bar hard)
- Optional: Micas, eco glitters, natural powders, or botanicals of your choice - add to liking.
make cold process soap in 10 steps
- Put on your PPE. We recommend gloves and safety glasses at minimum. Wear long sleeve clothing or protective sleeves. If you plan to sell your soap, we suggest wearing a hair net as well for cleanliness.
- For best results, heat your Trinity Blend on LOW in a wax melter (80-90 degrees F) and mix gently. If you do not have access to a wax melter, you can simply shake your container of Trinity oil thoroughly before measuring it. This will help to ensure even distribution of the mixture.
- Weigh out all ingredients needed for a batch to begin using the measurements listed above. Use large heat-safe plastic, glass or stainless steel containers. Equipment used for soap making should only be used for soap making. Double check your measurements before beginning and do not forget to tare your scale so you are not including the weight of your pitcher.
- Add the Himalayan salt into your water and mix using a whisk.
- Now add your water/salt mixture to your Trinity blend and use an immersion blender to mix for approximately 1 minute.
- Next, pour in your 50/50 lye solution and mix using an immersion blender until mixed completely (approximately 30-60 seconds). Your mixture will start to thicken (this is trace beginning to happen).
- When you reach a light trace, you can write your name into the batter or see the drip indentations in your batter. This is when you are ready to add your kaolin clay, fragrance or essential oil, and other additives to the mixture.
- Blend using an immersion blender until thoroughly combined or soap begins to thicken to a pudding-like consistency. This is when you are ready to pour into your mold. Do not wait too long or your soap will be too thick to pour.
- Pour into mold and add any swirls or designs to the surface of your soaps.
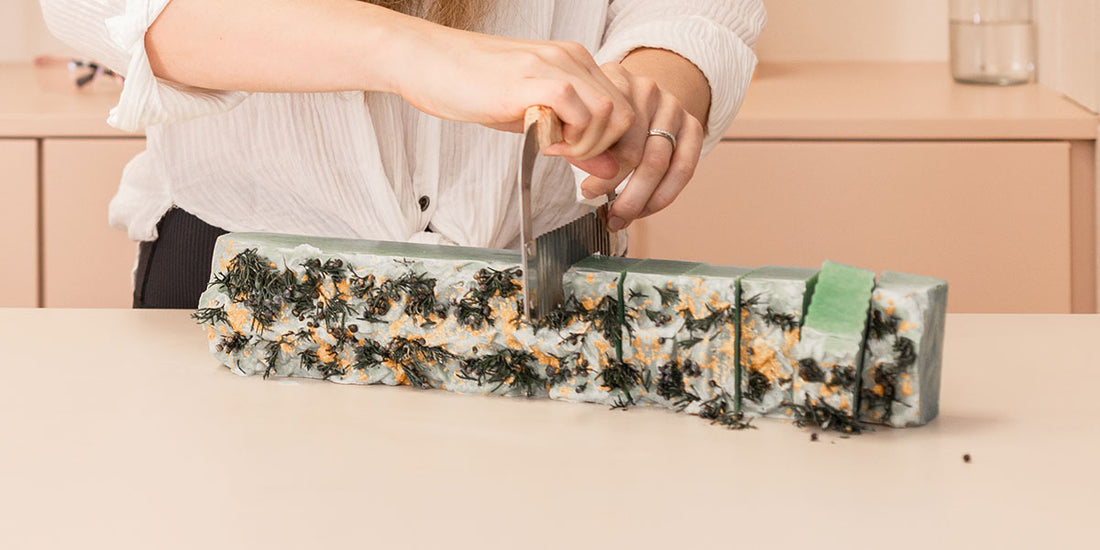
- Leave undisturbed for at least 24 hours then unmold and cut your bars using gloves. Soaps will be safe to use after 48 hours.

curing your cold process soap
Although your soaps are safe to use after 48 hours, they still contain additional water that will evaporate over time to create a denser, harder bar of soap.
Depending on the weather, you will reach your final product weight in 2 to 6 weeks.
This is what we refer to as “curing” your soaps, although most people get this evaporation stage confused with saponification and believe that your bars are not safe to use during this entire process.
Huge myth!
Your soaps are safe to use after 48 hours and saponification is complete, they just haven’t reached their lowest weight yet.
If you are in dry, hot weather this process will happen faster than if you live in a humid environment. Using dehumidifiers can help speed up this process.
selling your cold process soap
If you plan to sell your soaps, you must label the correct product weight on your packaging. Once you have the same bar weight for 3 days in a row, your bar is fully cured and that is the weight you will use on your packaging.
For example, if your bar initially weighs 3.5 ounces after 48 hours, it may cure to 3.2 ounces over the course of a few weeks.
If you follow the same recipe, as most soap makers who sell their product will, you will know well in advance the finished bar weight.
Therefore, even if your bar is still curing and 3.4 or 3.3 ounces at the time you package it, you can label it and safely sell it as a 3.2 ounce bar of soap.
This is a game changer as it will help your cash flow, inventory needs, product availability, and ability to say yes to sales opportunities as a small to large soap making business.
Waiting up to 6 weeks to sell after your product has been made is not scalable for most soap makers. Using this labeling tip, you can break through ceilings (or burst the bubble might be more applicable here!) and grow your business.

