


wick testing 101
Wick testing is a crucial step in candle making that ensures your candles burn safely, efficiently, and to their full potential. The right wick can make or break the performance of your candle, affecting everything from the size of the flame to how evenly the wax melts. Proper wick testing helps you achieve a consistent, beautiful burn while maximizing scent throw and ensuring safety, making it an essential practice for every candle maker, whether you’re a beginner or a seasoned pro.
Each fragrance oil, fragrance load, vessel shape and size, and wax type will perform differently. Because of this, it’s important to conduct a new burn test when changing anything about your candle.

When to Conduct a Burn Test
Burn tests should be conducted whenever your recipe is altered, including:
- Creating a brand-new candle recipe.
- Adding dyes or micas.
- Increasing or decreasing fragrance load.
- Adding enhancers or wax additives.
- Changing wax blends.
- Using a new fragrance.
- Making candles in a new container shape or size.
It’s important to conduct separate burn tests for every different combination and every different fragrance, as each may perform differently. For example, if you have four scents and want to add micas to two of them, you’ll need to conduct burn tests for each combination.
Once you’ve nailed down your starting fragrance load, fragrance, wax, and vessel size, begin with the Wick Sample Kit and reference our Wick Selection Guide to obtain recommendations for which wick to begin testing.
How to Conduct Candle Burn Tests
- Trim the wick to 1/8″ – 3/16″ (3.2mm – 4.8mm). This is extremely important.
- Place candles on a heat-resistant surface in a safe, draft-free, undisturbed space with a moderate ambient temperature.
- Light the candles and note the time. Do not leave candles unattended.
- After two hours, observe the melt pool. It should reach the full diameter of the candle. If not, the wick might be too small or too long when lit.
- If there isn’t a full melt in 2-3 hours, you may need to move up in wick width. If there is only a small amount of wax on the sides of the container, keep burning as it may resolve after a few test cycles.
- Record details of the melt pool, flame height, and any smoking or sooting. Consider taking a photo for reference.

To simplify this process, use the My Candle Tests app! This app is free to download and allows you to easily record, cross-reference, and save each burn test, ensuring you never lose track of your findings. With the app, you can manage all your testing data in one place, compare results across different tests, and fine-tune your approach with confidence. Whether you’re testing one candle or managing multiple variations, My Candle Tests keeps your data organized and accessible, making it the perfect tool for both beginners and seasoned makers alike.
- After four hours, note the details again and extinguish the candle. The melt pool should reach the edge of the vessel and be ½” (12.7mm) deep.
- If the melt pool is deeper than ½” (12.7mm), or if the flame is too high, the wick is too big.
- Let the candle cool completely and repeat the steps. Tap off any ash or burnt-top edge before relighting. We recommend one burn cycle per day.
- Repeat until the candle has burned to the end of its life cycle.
Conduct your tests thoroughly to ensure safe and optimal candle performance. Whether you’re new to candle making or a seasoned pro, burn testing with our Wooden Wick Sample Kit, Performance Cotton Wick Sample Kit, or bamboo mini kit is essential for success. Use our Wick Selection Guide (a quick quiz offering suggestions based on your wax and vessel) to get started.
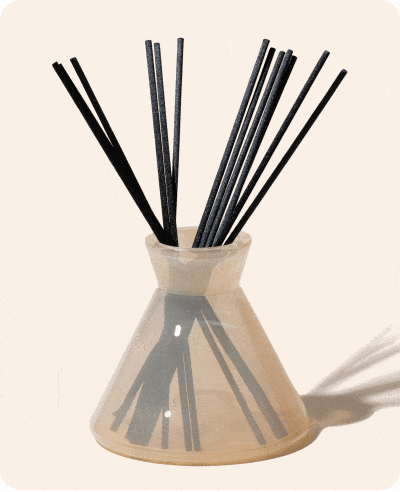
Wooden Wicks
Our wooden wicks are crafted from sustainably sourced wood, providing a unique and elevated burning experience with a distinctive crackling sound that adds ambiance to any space. These wicks come in various styles and sizes, including flat, shaped, and multi-ply options, to accommodate a wide range of wax types and vessel sizes. Wooden wicks are known for their clean burn, minimal carbon buildup, and ability to create a beautiful horizontal flame. With their rigid structure, these wicks remain upright during pouring, making them a favorite among both beginner and experienced candle makers. Plus, wooden wicks are easy to trim and maintain, offering an artisanal touch to every candle. 
Thickness: Reflected in the package title. For example, Crackling Wick .02 is .02" thick. Thickness increases in .01 increments up to .04".
Width: Check the width guide on the package. Flat Wick varieties range from .375 to .750.
Wooden Wick Types:
- Crackling: Flat wick, dark wood, creates a soft, crackling ambiance.
- Whisper: Flat wick, light wood, minimal crackle.
- Shaped: Tube, spiral, or X-shaped, dark wood, with unique flame shapes.
Wooden Wick Styles:
- Single Ply: Best for easy-to-burn wax blends.
- Booster: Suitable for most wax blends, including Virgin Coconut Soy.
- Ultimate: Features an engraved booster, ideal for Virgin Coconut Soy and 100% Soy.
Cotton Wicks
Advanced, patented technology gives Makesy’s Performance Cotton Wicks burn-efits like you’ve never seen before. These wicks feature a tightly knitted core made with a biodegradable, plant-based fiber that provides a consistent burn every time and maintains a rigid structure, keeping the wick upright as you pour. Once lit, the performance cotton wick begins to curl as it burns, which prevents carbon ball buildup and self-trims to maintain the ideal height with each burn. Sounds pretty lit, right? 
These wicks are perfect for a variety of waxes and are designed to provide optimal performance in container candles, reducing the need for constant trimming and ensuring a clean, even burn throughout the candle’s life.
Cotton Wick Sizing Chart
Choosing the right size is crucial, and Makesy’s Cotton Wick Sizing Chart is here to guide you! This easy-to-use chart helps you select the correct wick size based on your wax type, vessel size, and desired burn performance. Simply match your wax and vessel specs to the chart, and you’ll get a recommended wick size that’s ready to test. This step saves time and helps narrow down your starting options, so you can focus on fine-tuning your candle’s performance.
Bamboo Wicks
Each wick type and style is suited for different wax types and candle sizes, so it's important to choose the right one for your specific needs. Use our Wick Selection Guide and Sizing Chart to help you get started on finding the perfect wick for your candles. here’s a new sustainable innovation lighting the way—the world's first bamboo wick. Bamboo wicks aren't just better for the planet—they’re naturally designed to burn better, too. Thanks to bamboo’s micro-holes, they absorb more wax for a stronger, smoother flame. Crafted from 100% natural bamboo pulp and fiber, these pre-clipped wicks are an eco-friendly alternative to traditional cotton wicks, offering a clean, consistent burn across a wide variety of waxes. Bamboo wicks are coated in a proprietary natural wick wax that is sustainably sourced, ethically harvested and cruelty-free. They're Oeko-Tex® certified and developed in accordance with the RAL Candle Quality Mark, so you can feel confident in their safety and performance. Fully biodegradable and sustainably harvested, bamboo wicks are here to spark a new era in clean candle-making.
Want to test them all?
Our Bamboo Wick Mini Kit 6" comes with the following:
4x bamboo wick 34
4x bamboo wick 35
4x bamboo wick 36
4x bamboo wick 37
4x bamboo wick 38
4x bamboo wick 39
Wick Selection Guide
Reference our Wick Selection Guide for starting suggestions based on your wax type and vessel size. Remember, wick suggestions are starting points; adjustments may be necessary. Trial and error are integral to the making process!
Common Burn Testing Mistakes
- Avoid shortcuts like swapping wicks mid-test. Each test should replicate the exact product as it will be sold to ensure accuracy. Approach burn testing as both a science and an art!
-
Conduct separate burn tests for every fragrance and any changes in additives or fragrance load. Factors like fragrance type, load, dyes, micas, and other additives affect wick performance.

Summary:
- Create your control candle and label it with wick size, vessel size, wax type, fragrance, and load.
- Allow the candle to cool for at least 72 hours before trimming or burning.
- Trim the wick to 0.2” (5mm) before lighting.
- Burn the candle for at least 2 hours or until wax melts to the edges of the vessel.
- Do not burn for more than 4 hours at a time. Do not move the candle when hot.
- Always trim the wick where the wood naturally breaks off before relighting.
- What to Look for During Your Candle Burn Test
- The optimal wick will have a full melt in 2-3 hours, a ½” melt pool, and a ½” flame. Adjust wick width or thickness as needed based on burn results. If you encounter issues like smoking or excessive flame, downsize the wick width or thickness.
Next Steps in Your Candle Making
Congratulations on conducting your first burn test! Don’t be discouraged if it takes several attempts to find the perfect wick—trial and error are all part of the process. Keep testing and adjusting until you achieve the optimal results for your specific candle recipe.
Happy Making!

