Make Paraffin Wax Wooden Wick Candles
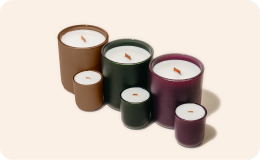
Today, we'll dive into the art of candle making using paraffin wax, the world's most popular choice for candles due to its hard nature and versatility. Whether you're crafting pillar or container candles, paraffin wax, developed in the 1850s, is prized for its opacity, lack of color and odor, and consistent burn qualities. Follow these eight simple steps to create your very own luxury paraffin wax wooden wick candle.
1. Gather Your Materials:
Before you begin, ensure you have all the necessary supplies. You'll need:
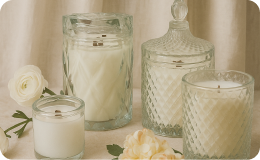
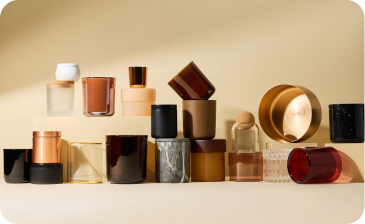
- Vessels: We're using two from our Aura candle jar collection today.
- Wax: Paraffin wax is our choice for its excellent properties.
- Fragrance Oil: A wide selection of clean fragrances!
- Wooden Wicks, Universal Wood Wick Clips, Wick Stickers: Essential for proper burning.
- Safety Labels, Pouring Pitcher, Stove Safe Pot: For safe handling and melting.
- Stirring Utensil, Thermometer, Wick Trimmers: For precision in crafting.
2. Prepare Your Workspace:
Cover your working area or choose an easy-to-clean surface. Clean out your vessels with a damp cloth to ensure no dust or residue remains.
3. Melt the Wax:
Fill a stove-safe pot with water up to about three inches (12.7 cm) high and heat until it's barely simmering. Chop your paraffin wax into small chunks and place them in your pouring pitcher. Let the wax melt completely in the double boiler setup, reaching the appropriate mix and pour temperature. Check the manufacturer's guidelines or product page for exact temperatures.
4. Assemble Your Wicks:
If using wooden wicks, they're simple to set up with their Wick Clips. Choose the right wick based on your wax and vessel size using our online wick selection guide. Secure the wick into the clip and adhere it to the bottom of your vessel with a wick sticker.
5. Check and Adjust Wax Temperature:
Once the wax reaches the ideal temperature, it's time to integrate the fragrance oil.
6. Mix Fragrance Oil:
Remove the pouring pitcher from the double boiler and add the fragrance oil. Stir briskly for two to three minutes to ensure the fragrance molecules bind well with the wax. For our Aura vessels, we're using one ounce of fragrance oil per candle, resulting in a 10% fragrance load.
7. Pour the Wax:
Gently pour the candle wax and fragrance oil blnend into your vessel, leaving about half an inch to one inch of the wick exposed.
8. Let the Candles Set:
Allow your candles to set on a flat surface for at least 24 hours. After they've cooled, trim the wick to about 0.2 inches (5 mm) above the wax and apply safety labels to the bottom.
Candle Care Tips:
For optimal use, trim your wick between burns where the wood naturally breaks off. Burn your candle in cycles of two to three hours to achieve a full melt pool for even burning and maximum fragrance enjoyment. Store candles upright in a cool, dry place out of direct sunlight.
Be sure to tag us in your finished creations on Instagram using #makesymade for a chance to get featured on our wall of inspo & win a $100 makesy gift card. Happy making!

