


How To Make Melt & Pour Soap
Homemade soap making is so much fun once you get the hang of it!
There is a ton of room for customization, like the kind of creamy, nourishing, all-natural melt + pour soap base you use, which fragrance oil you mix in, and the creative freedom you have to add enhancers like natural powders, dried botanicals, mica, and eco glitter.
To get started on your soap-making journey, you can try making melt & pour soap which is perfect for beginners!
Keep reading for step-by-step instructions on how to make the perfect bar of melt & pour soap.

melt & pour soap supplies
Here's a list of everything you'll want to gather before you start making.
- Melt + pour soap base, we love coco mango butter (made with nourishing mango butter) and olive hemp seed (which blends coconut, hemp seed, and olive oil)
- Fragrance oil, you’ll love cashmere & vanilla!
- Soap mold, the silicone rectangle mold is always a good choice.
- Enhancers, dried botanicals are a fun texture to use!
- Or add shimmer with mica.
- Use powders as natural colorants
- Glass pouring pitcher, microwave-safe to melt, mix, and pour your soap.
- Stick blender (optional)
Makesy offers a lot of different fragrance options for every scent preference from floral and fruity to earthy and spicy. All of our fragrance oils are compatible with our melt & pour soap bases and provide a luxurious, long-lasting aroma.
our go-to melt & pour soap recipe
Step 1
Heat your soap base in the microwave using your glass pouring pitcher or on a double boiler until completely melted.
If you’re using the microwave, make sure to only heat your soap base in 30 second intervals.
Step 2
Measure your fragrance to your desired fragrance load. You’ll always want to refer to your fragrance “skin safe” percentages as recommended for soaps to ensure best results.
The range for each fragrance will vary so it’s very important to have this number in mind. If you’re melting 1 lb of a block of soap, then one of our 10 ml / 0.33 oz fragrances will be perfect to add to that.
Pour and stir your fragrance oil into your melted soap base for 2 minutes so it fully combines.
Step 3
Time to get creative! This is where you make your soap your own and decorate it to achieve your desired look by adding in mica, eco glitter, natural powders, or dried botanicals.
If you’ve melted 1 lb of soap and are adding in mica to give your soap a fun shimmer and shine, you can add about a teaspoon of mica and thoroughly mix it into your melted soap.
If you’re using botanicals, you can mix them into your melted soap before you pour it into your soap mold, then also sprinkle some on top once it’s poured.
Remember, you can use more than one additive at once, it just depends on what kind of look you’re going for.
Step 4
Pour time! Once you’ve added in the enhancers of your choice, you can pour your melted soap into your soap mold. This is the time to decorate the tops of your bars of soap with more botanicals or glitters if you’d like.
Step 5
Cure time! One of the nicest things about Melt + Pour soap is that the cure time is significantly shorter than with the traditional soap making processes. We recommend letting yours cure for at least 12 hours. Once it has cured, it’s yours to lather in or sell!

soap making tips
If you’re adding botanicals into your melt & pour soap base, make sure that the base you're using has a pH between 8 and 10 to prevent mold build-up.
Also make sure you're only using botanicals or organic matter that have been pre-dried and naturally treated to avoid adding water into your recipe and prevent mold from forming.
Additionally, your soap making and storing environment play a role in whether or not mold will form in your soap.
Remember to keep your work area free of excess moisture and humidity every step of the way to prevent this from happening.
It’s also important to let your customers know that if your soap contains botanicals or any type of organic additives, they need to make sure they store their soap properly on draining caddies where excess water can run off after use.
Suggest turning on bathroom fans and opening windows to eliminate humidity so that their soap bars can dry quickly and not stay warm or wet for an extensive amount of time after use.
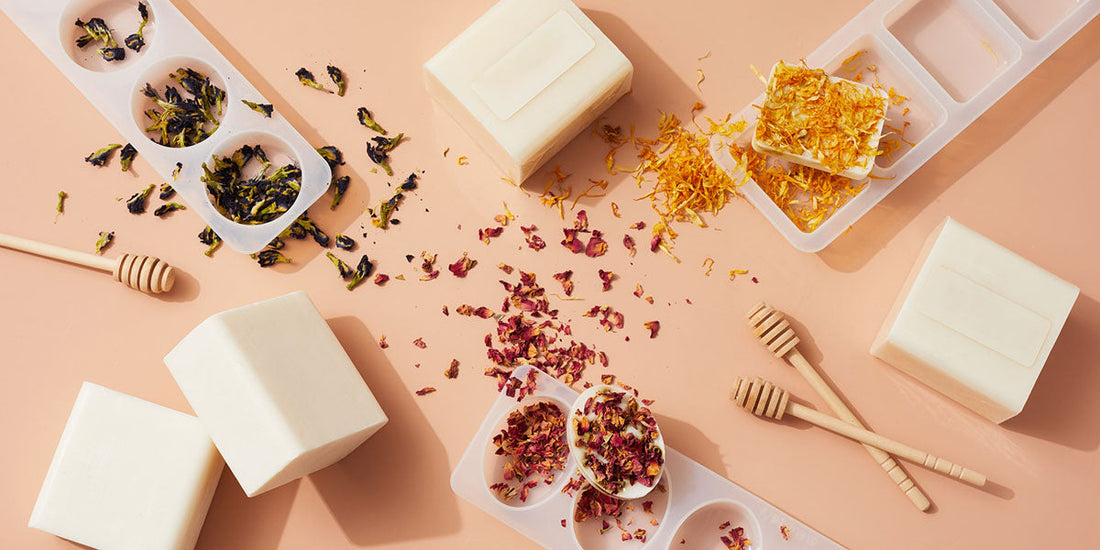
adding dried botanicals to soap
We recommend only using the following botanicals to decorate the TOP your melt & pour soap.
- Rose Petals
- Lavender Buds
- Juniper Sprigs
- Organic Chamomile Flowers
- If adding these on top, let your soap set for at least 24 hours, then spray some alcohol on the top of your soap where you wish to place your botanicals.
- Once the alcohol has been sprayed, lightly press the botanicals into the soap. Alcohol will create a glue-like substance and the botanicals will stick to it.
- Since the alcohol has a high evaporation rate, it will dry quickly and prevent any type of additional moisture from building up.
- This method should preserve the life of the dried botanicals on your soap.
This next group of botanicals are safe to mix INTO your soap base AND sprinkle on top:
- Calendula Petals
- Blue Cornflower Petals (sensitive to acidic pH change)
- Safflower Petals
- We recommend adding these when your soap base has melted, but not while it's steaming hot, to prevent the steam from getting absorbed into the petals.
- Once you've mixed these into your base, you can pour the entire soap base into your soap molds.
- More petals can be added on the top immediately after you've poured your base, or you can add them using alcohol as previously mentioned.
take your soap making to the next level
Now that you’re officially a soap maker, you can try making all kinds of different soap combinations - like this one here. Or if you're ready to try another style of soap making, read our tutorial for making cold process soap.
Let us know how you’re making your own sudsy combos by posting a photo on Instagram and tagging us @makesy. We love sharing real maker creations and hope they inspire other makers, too!
Happy making!

