How To Make A Soy Blend Wax Candle
If you’ve ever wanted to master making your very own soy-blended wax candles, this blog is for you!
Soy-blended wooden wick candles may seem a bit tricky to make, but if you’re using our exclusive virgin coconut soy wax, it doesn’t have to be!
This wax is formulated to provide you with amazing glass adhesion, fantastic scent throw, and sets super smoothly and evenly in candles.
In just seven simple steps, you can make your very own luxury soy-blended, clean-burning, wooden wick candle.
Keep reading as we guide you along this fun creative making journey!
soy candle supplies
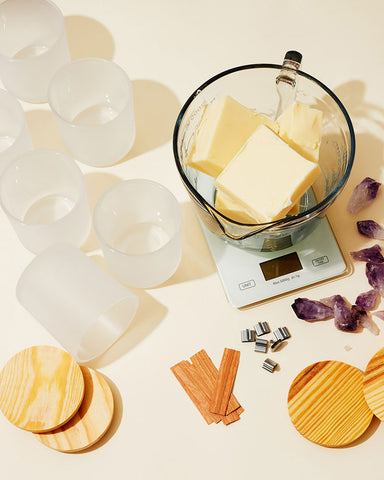
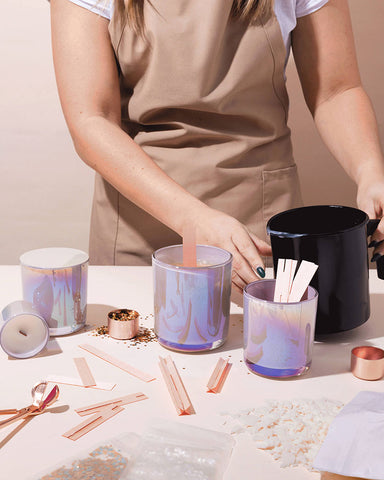
First, make sure you have all the candle making supplies you need for this fun creation.
- candle jar
- soy-blended wax
- fragrance oil (we love natural creamy vanilla + coconut sugar)
- wooden wicks - you can determine which wick you need using our wick selection guide. Our recommendation for the virgin coconut soy wax is the ultimate wood wick 0.03 in 0.625” width.
- wood wick clips
- wick stickers
- candle safety labels
- stove-safe pot or wax melter
- pouring pitcher
- stove-safe pot stirring utensil
- thermometer
- wick trimmer
- wax cutter/knife
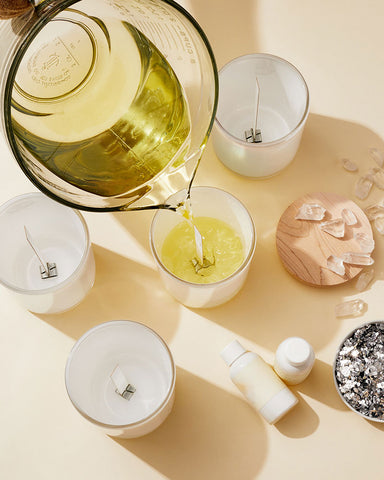
steps to make a soy candle
Step 1
Fill a stove-safe pot with water until the water reaches about 3” / 12.7 cm in height. Then preheat the water until it is barely simmering (not boiling).
Step 2
Divide your wax into small chunks with a wax cutter or knife and place them into a pouring pitcher.
The total ounce fill of each vessel is equivalent to the amount of wax needed per vessel. (Example: 8 oz vessel = 8 oz of wax needed)
Step 3
Carefully place the pouring pitcher into your water-filled pot. Leave the pouring pitcher in the pot until your wax is completely liquified and has reached the appropriate mix and pour temperature for your wax type.
You can find the mix + pour temperature for your wax by referring to the manufacturer or product page where you purchased the wax.
Candle making tip: If you’re using our Virgin Coconut Soy Wax Blend, the mix + pour temp is 180° - 190° F / 82° - 88° C.
Step 4
While your wax is melting, assemble your wick and place it into your candle jar. Press the wick into a wick clip by gently rocking the edge of the wick back and forth until the bottom is completely secured in the clip.
Then, attach a wick sticker to the bottom of the wick clip. Press the wick clip into the center bottom of each vessel you are making candles with so they are wax-ready.
Step 5
Use your thermometer to check the wax temperature. Once you've reached the perfect temperature (like we mentioned in Step 4), remove the pouring pitcher from the pot using a heat resistant glove or oven mitt. Measure and pour in your fragrance oil and stir briskly for 2 to 3 minutes.
Candle making tip: You can find the best fragrance percentage for your size of candle jar using our handy dandy fragrance percentage chart.
Step 6
Slowly pour your wax and fragrance blend into your vessel until between 0.5" (12.7 mm) - 1" (25.4 mm) of the wick remains above the wax, depending on preference and vessel size.
Step 7
You’re almost done! Let your candle cool on a flat surface for at least 24 hours, then once it has sufficiently cooled, it’s time to trim your wick.
Trim it to about 0.2” or 5 millimeters above the wax. Then, apply a safety label on the bottom of your candle jar for the final finish.
Candle making tip: Don’t forget to trim your wick where the wood naturally breaks off before relighting your candle. This will help avoid sooting and overheating.
It’s recommended to burn your candle for 2-3 hours at a time (until a full melt pool is achieved), but no longer than 4 hours at a time.
Watch this video to see these steps in action: how to make a soy blend wax candle.
Ready to try making your own? Head on over to the shop and find all the candle making supplies you need to make your very own collection.
Don’t forget to tag us @makesy on social media so we can feature your incredible candle creations!
Happy making!

