Small Business Photoshoot Tips

Lights, camera, traction!
Product photography is a major key when it comes to marketing your business.
Customers need visuals before they buy something and reeealllyyy good photography will help take care of that.
Elevated product photography means more sales and of course, telling a really good brand story.
Here are tips to help you nail that next shot!
find, meet & agree with your photographer
We bet you’ve done some extensive research to find the perfect one. When evaluating photographers, we recommend seeking ones that have specific qualities like creativity, an eye for detail, patience, flexibility, good people skills, and most of all, someone who is passionate about what they do.
Photography is an art form so it’s important to choose someone that clearly understands the goal of the photographs they’re taking and has the creativity and imagination to make your visions come to life.
Once you’ve chosen a well-suited gem of a photographer, you should definitely meet them in person (you don’t need a catfish sitch) so you can make sure they mesh with you and your brand.
Then, get into logistics and make a formal, written agreement - how many photos will they be taking? Are there upfront costs before paying the total? When will you need final photos?
Discuss location, props, retouching, and make sure you own the assets. This is the time for you to communicate your needs and the opportunity for them to tell you their process. We dive into more details about some of these pieces below so keep reading for more tips!
Maker tip: Check out Soona Studios for a professional, collaborative, affordable option.
budget, budget, budget!
Communicate your budget to your photographer so you can stick within your means. Professional photography can be costly so you may need to keep an open mind and remain flexible about the cost, especially since these photos will help market and sell your products.
It may take some negotiation to get a price you’re willing to pay, but remember these photos are going to help boost your brand awareness and for that, it’s worth the investment.
Some photographers are willing to adjust prices if you acknowledge you may be a repeat customer as you start creating more products and need more photos taken. It doesn’t hurt to ask about deals that can help you both out and an established, ongoing partnership will help fulfill business needs seamlessly.
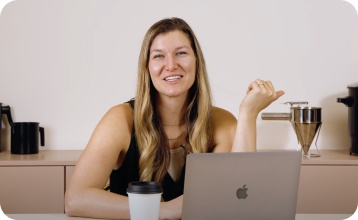
Maker tip: Sometimes a professional photographer isn’t feasible and that’s okay, especially if you’re just starting out! Check out this video and learn from a pro (aka Jess, one of our go-to’s) about DIY product photography tips + tricks:
Watch this: Taking Photos of Products
choose your location & setting
Make sure you have a specific location that is designated for the day of the shoot. Whether it’s at your house or if you rented a studio for the day, it’s important you have a set time and place that your photographer is aware of so both of you can plan accordingly. We highly recommend using plain backgrounds and good, natural lighting if you aren't using a full lighting system so keep that in mind when scouting locations.
find inspiration and communicate your vision
You’ve probably gone down rabbit holes of product photography examples (hello Instagram + Pinterest), and maybe even created a mood board with ideas you’d like to match.
Don’t be afraid to show your photographer photos that you’d like to emulate. Although it’s part of the photographer’s job to come up with ideas for photos as well, the more specific you are about your vision, the better they’ll be able to meet your needs.

show off your products in the best way
Before the actual photoshoot takes place, use your samples to play and set them up in a way that shows them off best. Try different scenarios and see what stands out.
Take sample photos with your own phone or camera just to get a glimpse of how they may potentially look. This is your chance to try different things and mirror displays of other brands’ photography that you think may work well for your brand. Take that Pinterest + IG inspiration to the next level!
Maker Tip: Check out this TikTok for some prop inspo: BTS Styling + Prop Play With Maksey.
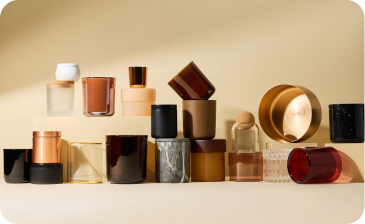
Our home care collection (pictured here) is styled with just the right amount of space, props, and product.
get your props & products ready
Make sure you have everything you’ll be taking to the photoshoot ready to go the night before - your top samples should be used in photoshoots since you want the best of the best to be seen by potential buyers. If there are any specific props you will need, make sure they’re packed as well.
Your photographer might have props they suggest based on the type of photos they’ll be taking, so be sure to ask them beforehand if they would like you to bring anything specific to make the shoot more efficient.
establish photo guidelines
Set up some established guidelines to follow like these:
- Aspirational & educational: Allow for your audience to learn from your photos and discover what your products are all about with the way the scene is set and props used.
- Approachable: Make sure your photos are inviting and filled with an ambiance that makes people want to revisit.
- Playful: If you have a playful brand, don’t be afraid to get creative and show off that playful side.
- Curated & focused: We love to use props to enhance the look of a product, but it should never distract or take away from the product itself! Props should make sense and tell a story based on your collection.
- Alignment: Use the “rule of thirds” by placing products in the center, flushed right, or flushed left to create visual interest.
know how you will be using your photography
Plan ahead by knowing how you will be using your finished photos. We suggest creating a “shot list” of what you need photos of and where they will be used (i.e. social media, website, banners). It’s important to communicate how you will be using these photos so your photographer can use best practices to shoot for each one.
If you have a graphic designer who will be working with your photos as well, consider how they will be designing with them. You might need a lot of blank space in some photos so you can place copy there - acknowledge those kinds of things so your photographer can adjust accordingly.
set deadlines & timelines
Save you AND your photographer a headache and set realistic deadlines. Ask upfront what timelines are like for your photographer so you’re aware of how much time it will take them to complete edits and give you final assets. If it will take them three weeks to finish everything but you need them in two, then you may need to reconsider your plan.
shoot more photos than necessary
It’s always better to have more options, especially if it’s your first time using a professional photographer. Having more photos to see and choose from will allow you to really hone in on what you like, what you don’t, and the style of your brand image that you want to build in the future.
create an organized photo management system
Once final assets are ready to go, make sure you have a system in place to group all the corresponding product photography together. Whether you’re using a google drive, dropbox, or flash drives, make sure your photos are all kept in one spot where you can continue to organize and distribute as necessary.
An amazing brand like yours deserves to be showcased by really good photos. Once you’ve mastered the process of getting those, you’ll start to see more consistency among your brand image and efficiency when it comes to marketing. Make your products stand out in the best way, Maker… they’re too good not to be!
Make sure you tag us @makesy on Instagram to show us your awesome photos. We love to see them!

